Port Layout
PORT1 = Primary WAN
PORT6 = Primary LAN
PORT2-5 = Open for either LAN or as additional WAN (If additional WAN links ordered)
Option of WAN or LAN: Secondary, Tertiary, etc WAN Active only if subscription was ordered with extra WAN links
Topology
OmniBridge can function behind an existing router, however it is preferable to have your OmniBridge connected directly to the upstream ISP modem.
Its important your OmniBridge has dedicated access to the upstream router to best perform its job at controlling bandwidth provided by the ISP*.
*** Do not attempt to bring it up behind another OmniBridge
Before beginning, make sure to log into the Partner Portal account that was used to order the OmniBridge.
Initial OmniBridge Setup
1. Plug the OmniBridge PORT1 (WAN) into an internet enabled upstream network running a DHCP server
- The OmniBridge should show online in your portal
2. Go back to your www.mdsmanager.com portal and configure the Zones tab as needed
- Setup the desired subnet and DHCP / DNS settings
- Make sure the LAN IP you configure DOES NOT match the IP for the upstream network's gateway (LAN Network IP must be unique from the upstream gateway's)
WARNING: Do not use ISP DNS servers for clients behind OmniWAN. ISPs usually block DNS traffic coming from a network outside their own. Once OmniWAN is deployed, your egress and ingress is at our DC, therefore it looks like the request is coming form a network outside their own
3. Plug a test client into Port6 (Default LAN Network Port)
- Verify your OmniNet protection by navigating to shieldtest.com and running a ShieldTest
4. IMPORTANT: Make sure to schedule a 30 Minute window with your customer to run Optimization on the OmniBridge since this testing is disruptive when run.
a. On www.mdsmanager.com, go to the OmniWAN tab for the subscription
b. Click the "Optimize" button to have OmniWAN immediately begin tuning your ISP links
c. Make sure it completes successfully
If you need it scheduled or have issues with optimization, please send an email to support@omninet.io
WAN Static IP Configuration
***WARNING MAKE SURE YOU HAVE THE CORRECT STATIC IP INFO FROM THE ISP TO AVOID ACCIDENTALLY ORPHANING THE OMNIBRIDGE WITH INCORRECT CONFIGURATION***
Note: If this OmniBridge was ordered with more than one WAN link, OmniNet recommends that you configure static links one at a time, leaving one in DHCP mode as a backup. Once the static IP is confirmed functional, you can then proceed configuring a second static IP on the other WAN link (if necessary).
To configure your OmniBridge for use on WAN connection with a static IP:
1. Connect your OmniBridge to an upstream network with a DHCP server running (as described above)
2. Once it is showing online, go to the OmniWAN tab on your subscription and click "EDIT" on the corresponding WAN port you want to configure to static IP
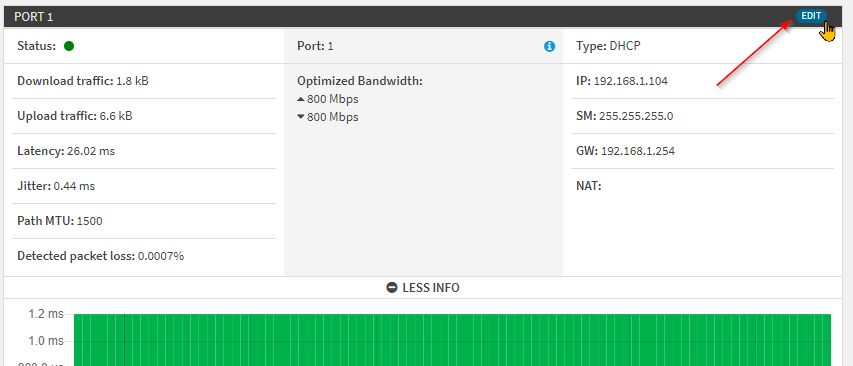
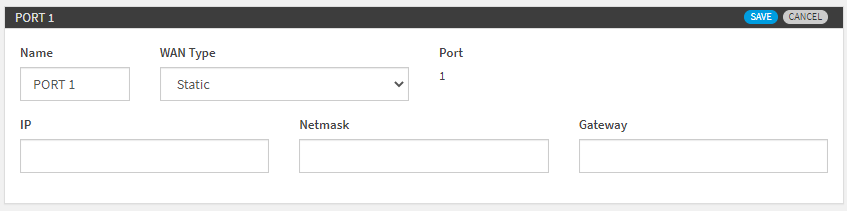
3. VERY CAREFULLY, enter the static IP information you confirmed with the ISP and hit "Save".
4. Connect the corresponding OmniBridge WAN port you configured to WAN port of the respective ISP
- Verify WAN link shows online on the portal
*Upstream bandwidth shared with other routers can impact the OmniBridge's ability to offer the best, if this configuration is required, consult with OmniNet Support regarding the topology as some additional review may be necessary.